Transferring files using WinSCP
Transferring files using WinSCP on Windows
Supported Clients:
| Download Client Softwares | OS Platform | AWS User Guide |
| FileZilla | Windows, Macintosh, and Linux | Use FileZilla |
| WinSCP | Microsoft Windows only | Use WinSCP |
| OpenSSH | Macintosh and Linux | Use OpenSSH |
FileZilla is the preferred client, but if that doesn’t work on your computer, the other 2 are options.
Notes:
- Please download and install one of the clients We will be using WinSCP in this document.
- Your SFTP server credential requires either a password or key-based You can use either.
- To keep these credentials secure, we are sending the details via a password manager name “LastPass”.
- While your computer maybe Windows, Mac, or Linux based, the example below should look the same or similar.
In this example, we’ll be using WinSCP on Windows to transfer files.
Download and install WinSCP Client on Windows
1.) You can download the installer from the WinSCP download page.
2.) If you have WinSCP running, close it. The installer will not run if it finds any instance of WinSCP running.
3.) Open the installation program by double-clicking on its icon. Follow the Installation package link.
4.) The WinSCP installer starts. Follow its instructions.
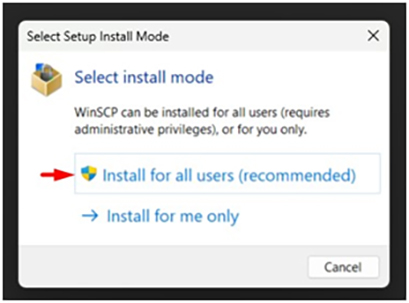
You can install WinSCP by selecting install mode
- for all users: This requires Administrator privileges. It makes WinSCP available for all users of the local machine. WinSCP will install by default to %ProgramFiles(x86)%, i.e. typically to C:\Program Files (x86)\WinSCP.
- for you only: WinSCP will be available to the current logged-in local account only. WinSCP will install by default to %LOCALAPPDATA%\Programs, i.e. typically to C:\Users\username\AppData\Local\Programs\WinSCP.
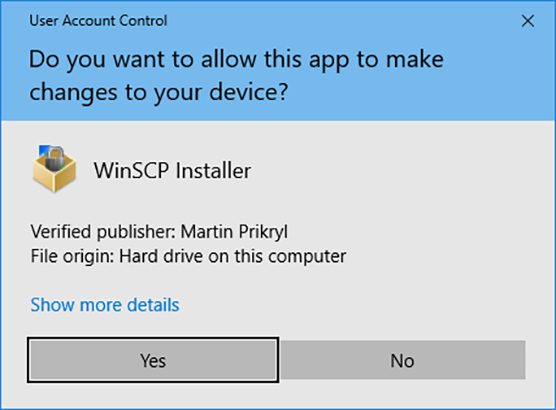
5.) Check that the Verified publisher is “Martin Prikryl” and confirm that you agree with the installation by clicking the Yes button.
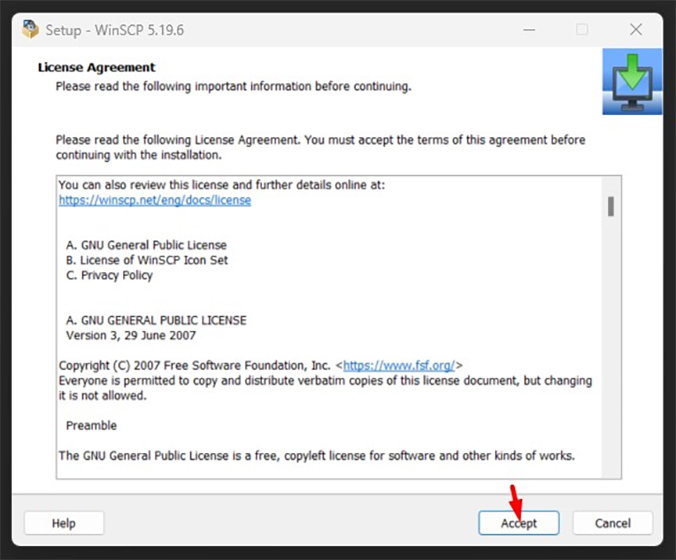
6.) On the License Agreement page of the WinSCP Installer, review the WinSCP license and press the Accept button to accept the license and proceed with the installation to the Setup Type page.
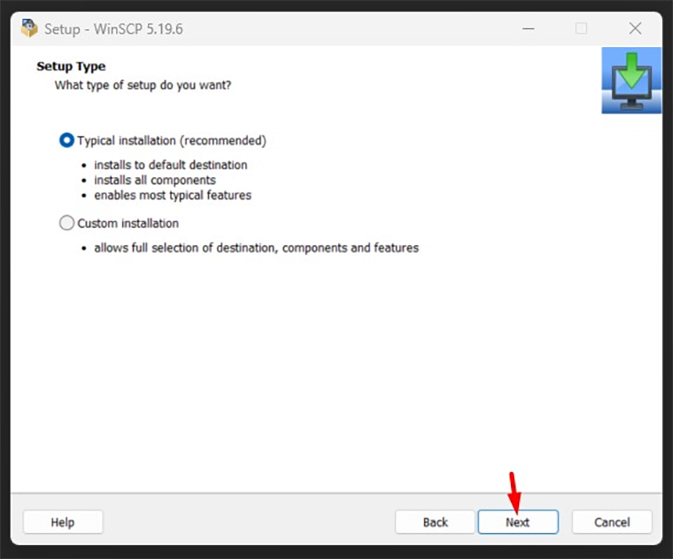
7.) On the Setup Type page of the WinSCP Installer, you select whether you want Typical installation or Custom installation.
Use the Next button to proceed with the installation
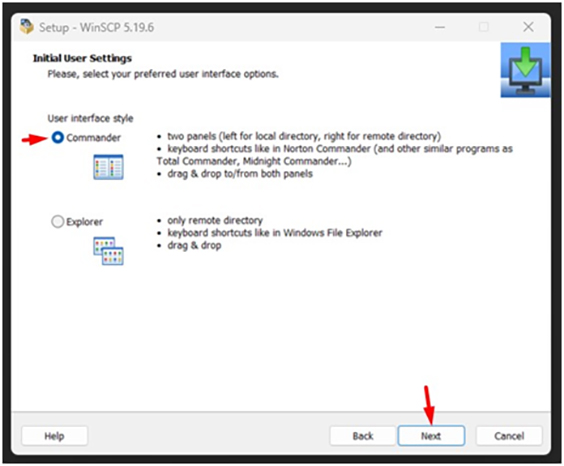
8.) On the Initial User Settings page of the WinSCP Installer, you select the default user interface.
Use the Next button to proceed with the installation to the Ready to Install page.
9.) On the Ready to Install page of the WinSCP Installer, you review your installation settings and start the installation.
10.) On this page you have the last change to go back (using the Back button) and change the installation settings.
Use the Install button to start the installation.
After clicking the Install button a brief installation process will take place.

11.) Once the WinSCP Installer finishes installing WinSCP, the Completing the Wizard page appears.
Use the Finish button to close the installer.
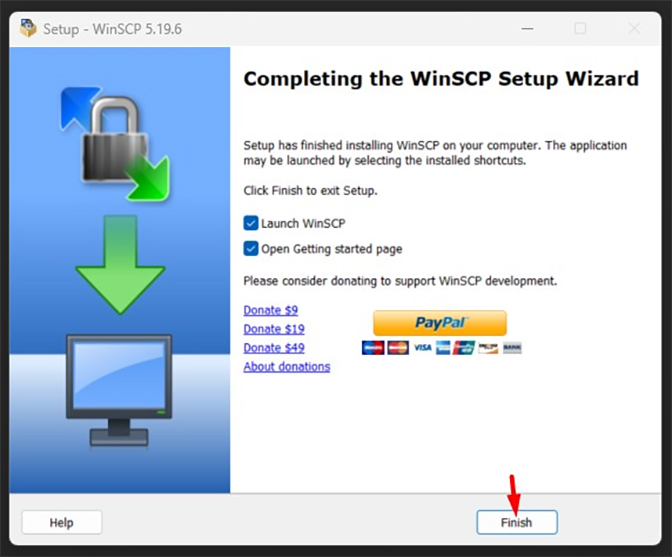
12.) By default the installer will start the WinSCP application and open the Getting started page.
Set up a Server Connection - Password-based authentication
Option #1: Password-based authentication
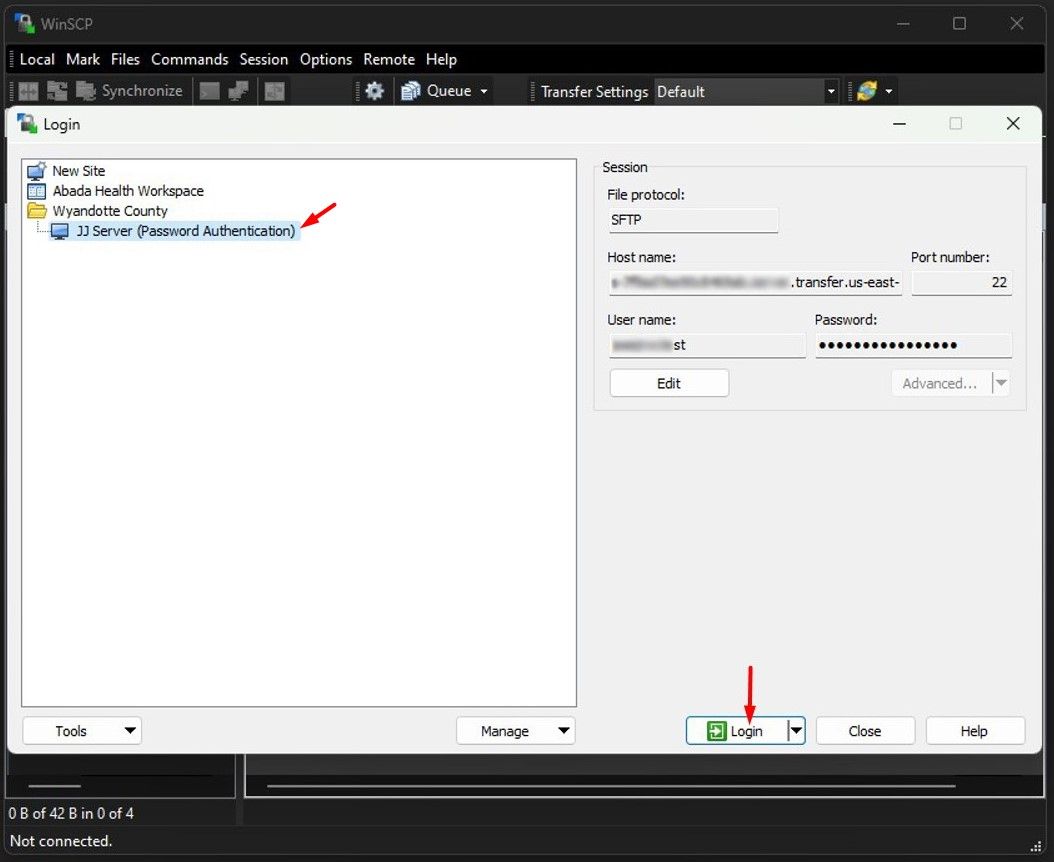
Start WinSCP. Login Dialog will appear. On the dialog:
- Select your File protocol.
When you are about to use FTPS protocol (FTP over TLS/SSL, not SFTP), select FTP and then choose one of the FTPS invocation methods). - Enter your host name to Host name field, username to User name and password to Password
- You may want to save your session details to a site so you do not need to type them in every time you want to connect. Press Save button and type site name.
- Press Login to connect.
Set up a Server Connection - Key-based authentication
Option #2: Key-based authentication
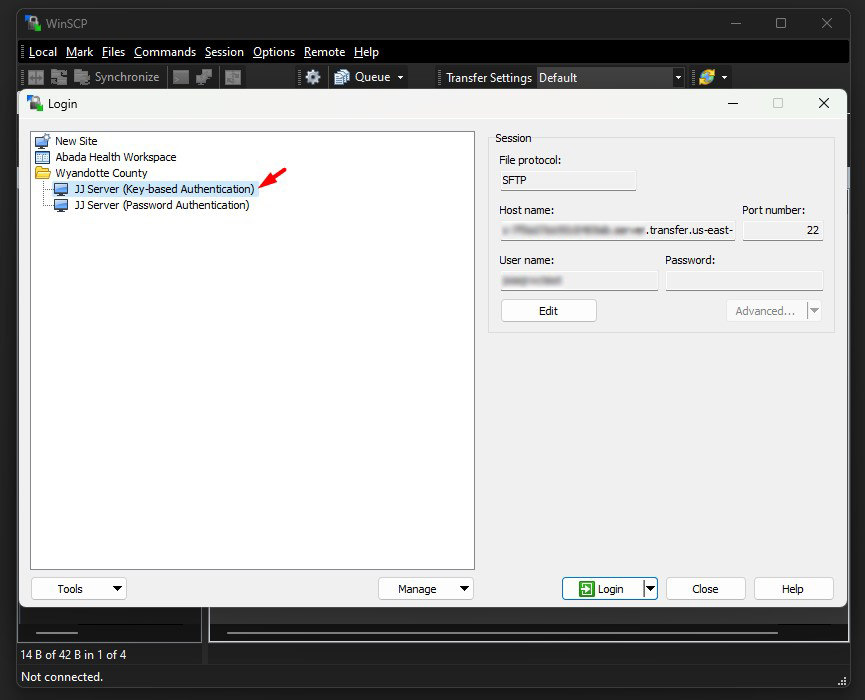
Start WinSCP. Login Dialog will appear. On the dialog:
- Select SFTP as your File protocol.
- Enter your host name to Host name field, username to User name.
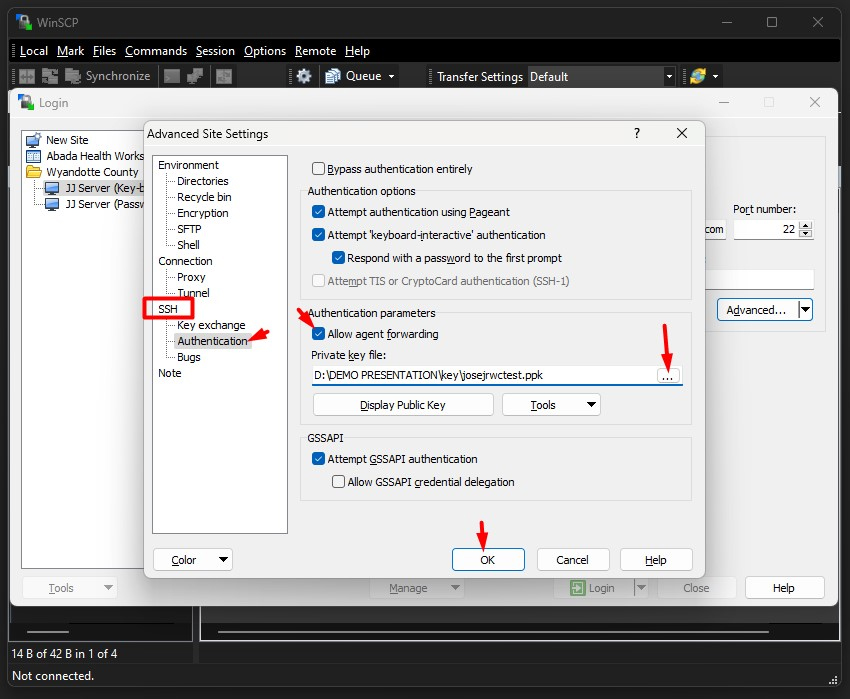
- Click the Advanced button to show the Advanced Site Settings dialog, and then navigate to SSH > Authentication page, and under Authentication parameters, check the Allow agent forwarding and click on browse button to specify path to your private key.
Alternatively, load the private key into Pageant. - You may want to save your session details to a site so you do not need to type them in every time you want to connect. Press Save button and type site name.
- Press Login to connect.
Troubleshooting Connection Issues
When you are not able to connect to the server:
- Make sure you use SFTP (SSH File Transfer Protocol) protocol that the server support.
- Read the guide above for connecting to SFTP server.
- Try if you can connect with other clients using the same protocol.
- If you are getting an error message like “Connection refused”, “Connection timed out” or “Can’t resolve host name”, it is likely that there is a local firewall set up with per-application rules. The rules may allow the other clients, but not WinSCP.
- For built-in Windows firewall, go to Control Panel > System and Security > Windows Defender Firewall > Allow an app or feature through Windows Defender Firewall. There you can add an exception for winscp.exe.
- If you are getting an error message, check the list of common error messages.
- If the server refuses to accept your connection or drops the connection suddenly, and if you cannot figure out by yourself then you should contact Anurag or JJ for further investigation.
Troubleshooting Timestamp Issues
When uploading a file was successful, but error occurred while setting the permissions and/or timestamp.
- If the problem persists, turn off setting permissions or preserving timestamp. Alternatively you can turn on ‘Ignore permissions errors’ option.
The server does not support the operation.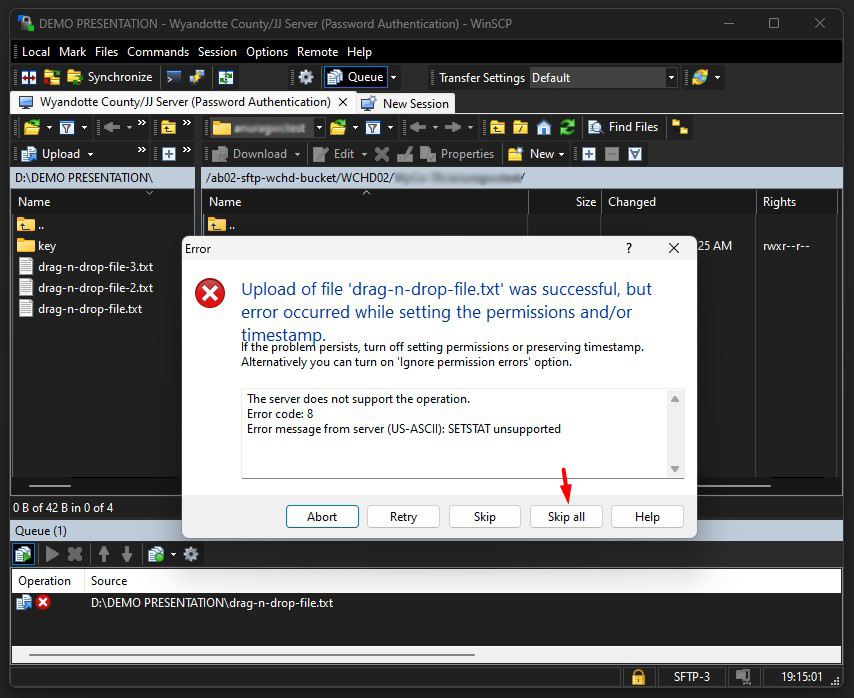
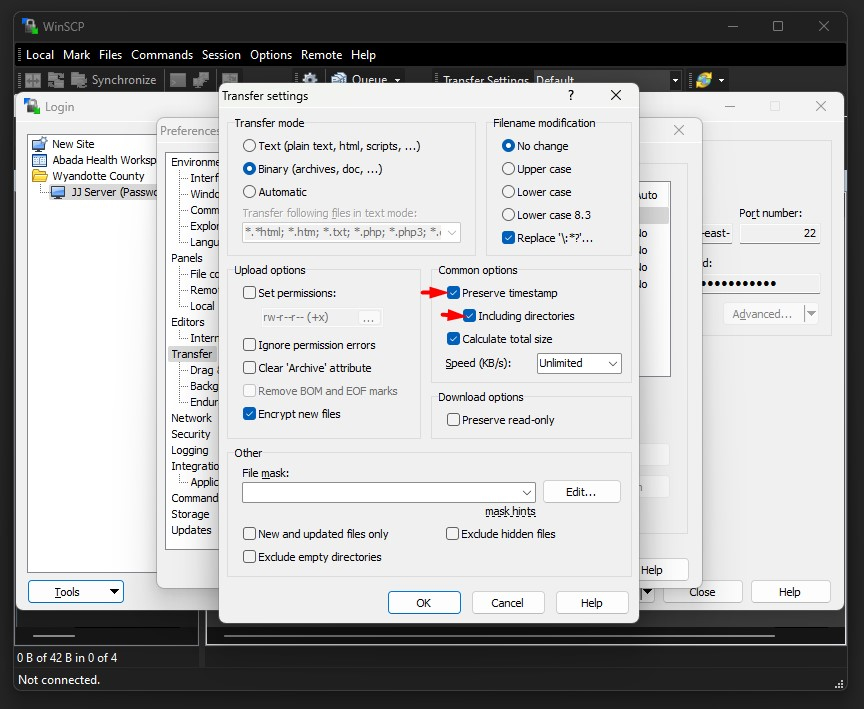
To fix the timestamp issue of uploading files, follow the screenshots below:
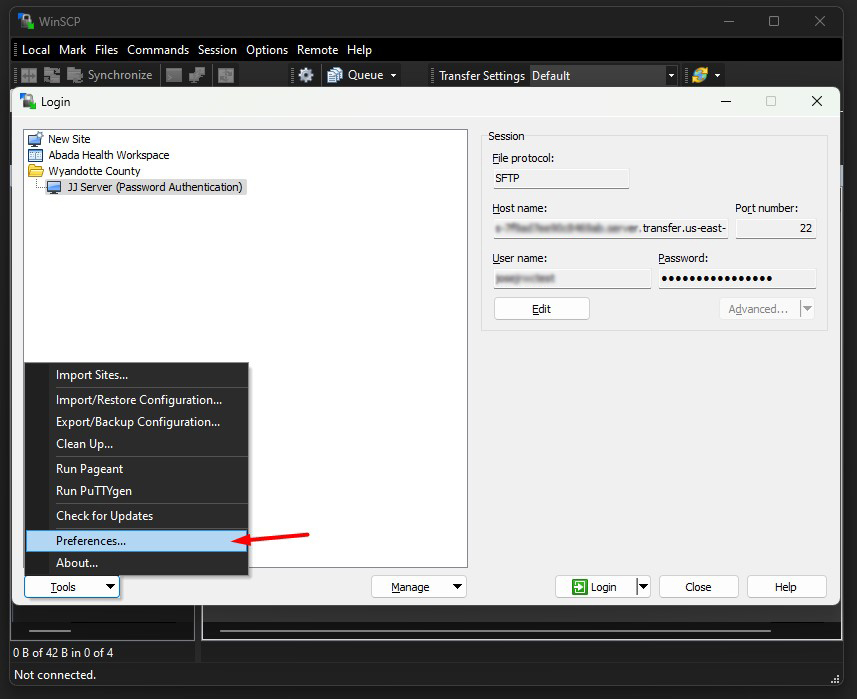
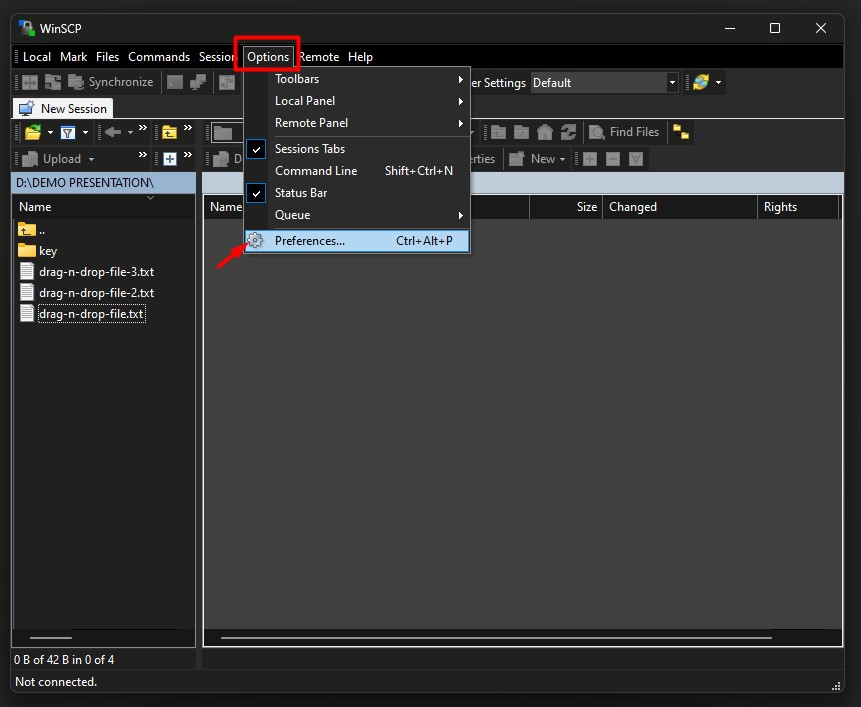
1.) To show Preferences dialog, click the Tools button or go to menu Options > Preferences
2.) Then navigate to Transfer, and click on Edit button
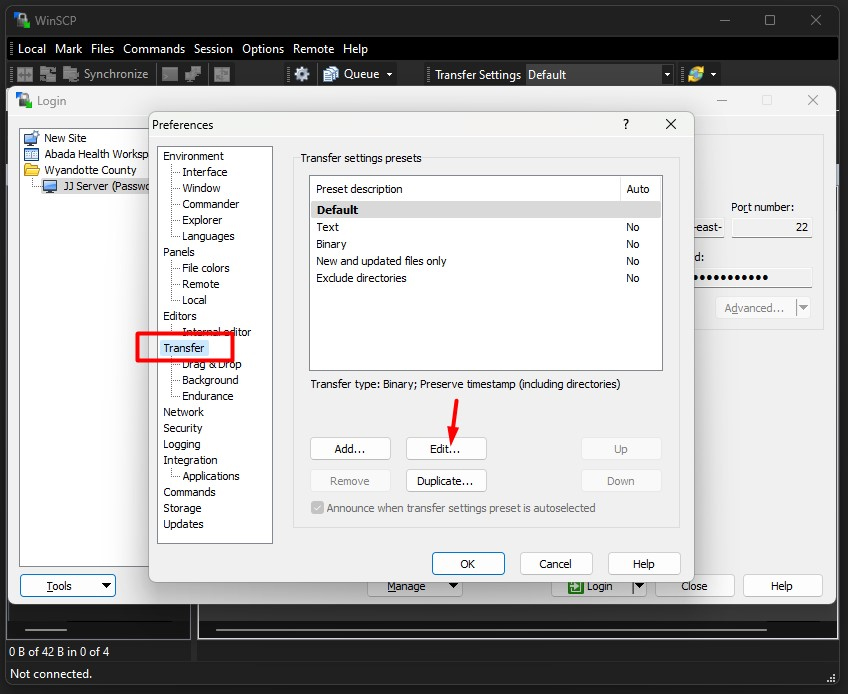
3.) Under “Common Options” uncheck “Preserve timestamp“. Click “OK”.
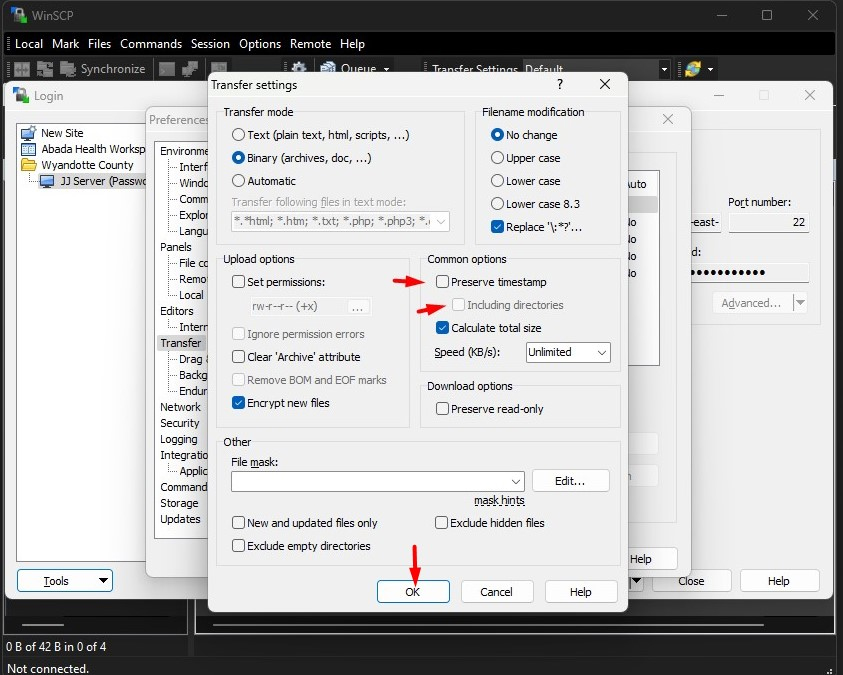
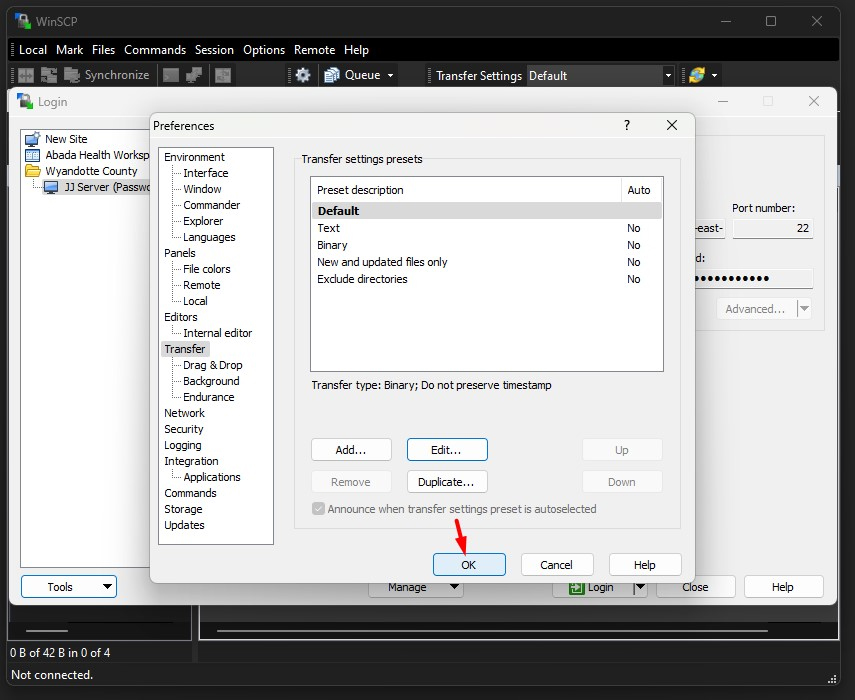
4.) Click “OK” again.
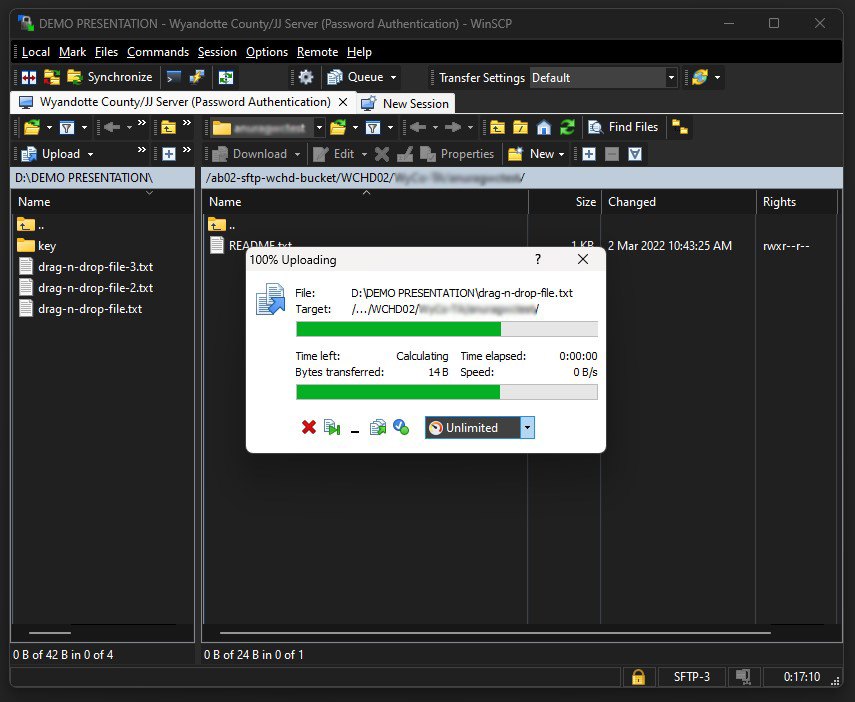
Upload Files to SFTP server
Once you are connected to your account of SFTP server, you will see content of default remote directory (typically a home directory of your account) on remote file panel.
Now you can simply drag the local files and drop them on remote file panel.
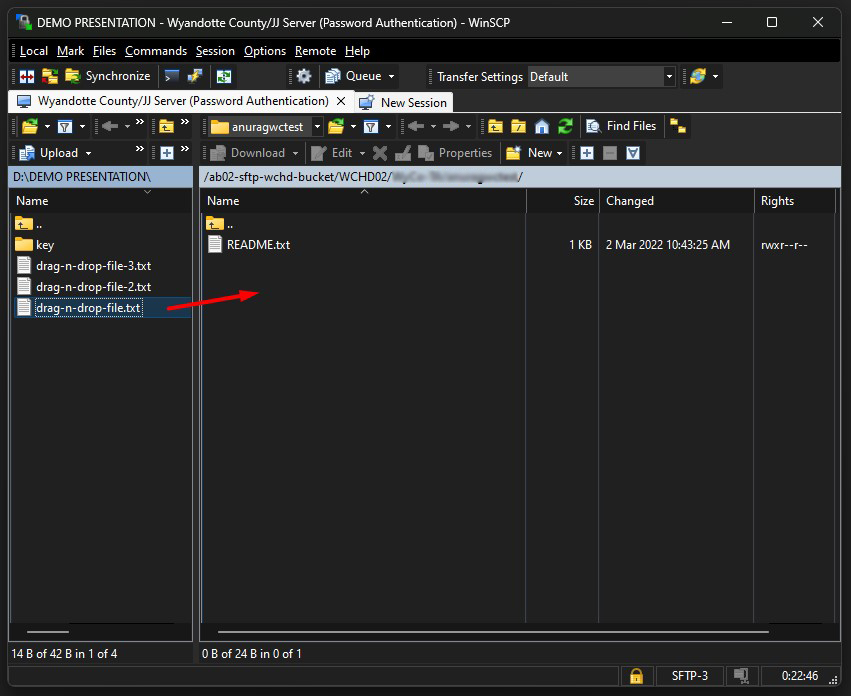
By default transfer settings dialog will appear. Typically you do not want to change any settings, so just press Copy.

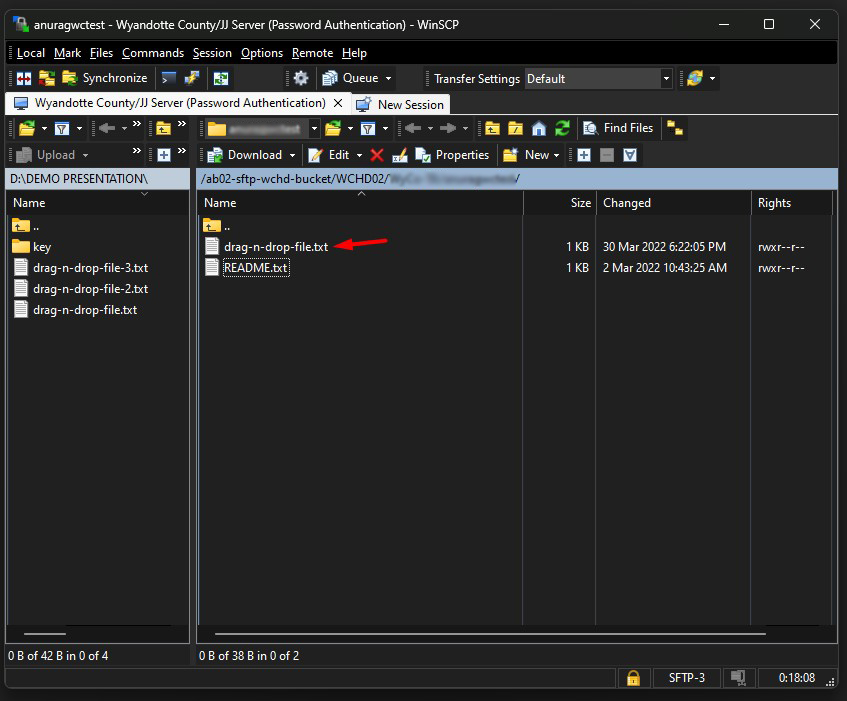
Uploading will proceed. Once it finishes, you will see uploaded file in remote file panel.