
Transferring files using FileZilla
Transferring files using FileZilla on Windows
Supported Clients:
| Download Client Softwares | OS Platform | AWS User Guide |
| FileZilla | Windows, Macintosh, and Linux | Use FileZilla |
| WinSCP | Microsoft Windows only | Use WinSCP |
| OpenSSH | Macintosh and Linux | Use OpenSSH |
FileZilla is the preferred client, but if that doesn’t work on your computer, the other 2 are options.
Notes:
- Please download and install one of the clients We will be using FileZilla in this document.
- Your SFTP server credential requires either a password or key-based You can use either.
- To keep these credentials secure, we are sending the details via a password manager name “LastPass”.
- While your computer maybe Windows, Mac, or Linux based, the example below should look the same or similar.
In this example, we’ll be using FileZilla on Windows to transfer files.
Step 1: Download and install FileZilla Client on Windows
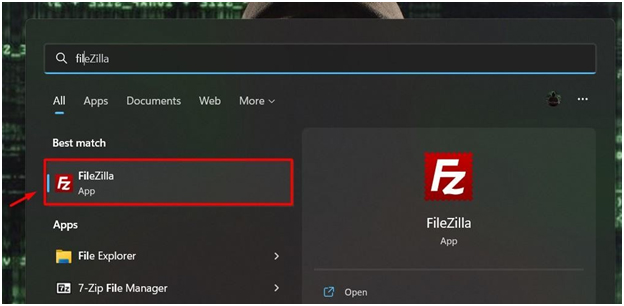
1.) Download the Filezilla FTP Client installer file for your Windows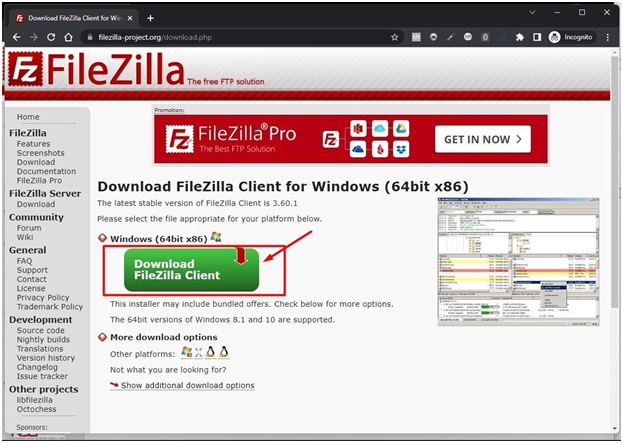
2.) A popup window will appear. Select the free edition of FileZilla Client to download the software.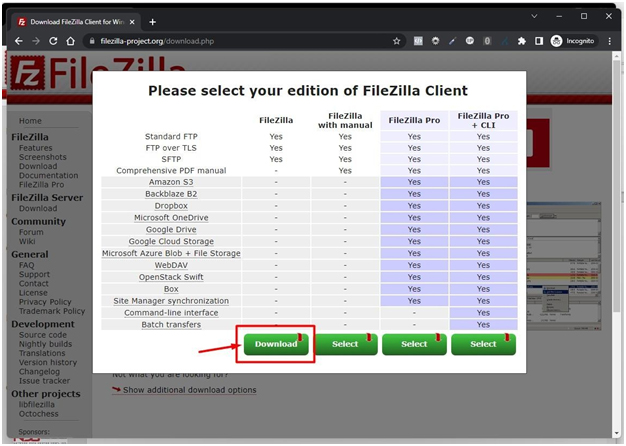
3.) Click the Discard button if a warning message unexpectedly appears. This is a quite common browser alert when downloading files from third-party sources. “This type of file could harm your computer”.

4.) Double click to Run the FileZilla FTP Setup. It will show a security warning. Read and accept it or click the Run option.
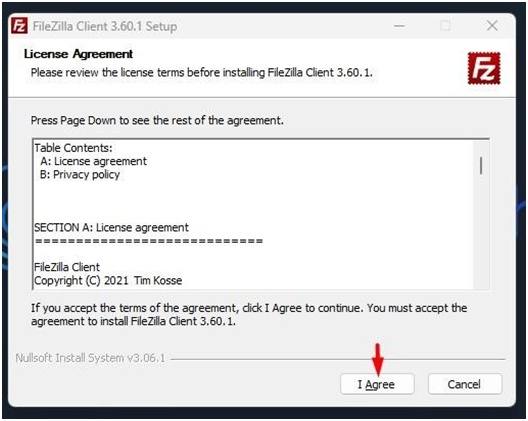
5.) The FileZilla Client will show a License Agreement. Read it and accept the agreement to install the FileZilla Client on your PC.
6.) Follow the installation wizard by clicking on the Next button until it shows the Install button. Then Click on it.
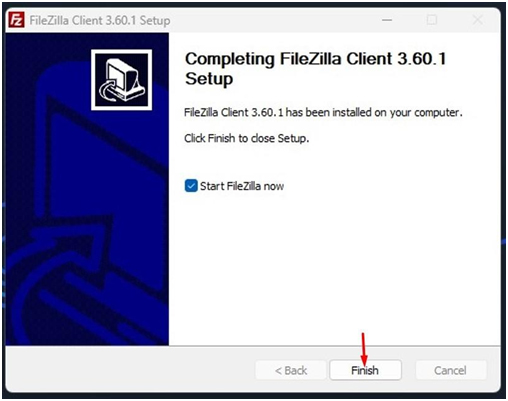
7.) The installation can take a few seconds but will depend on your PC. Once it completes, click the Finish button.
Congratulations. You successfully installed the FileZilla Client on your Windows OS. Now you can start using it.
There are two (2) available options for authentication. Choose one that best suits your requirements.
1.) Password-based authentication
Step 2: (Option 1) - Password-based authentication
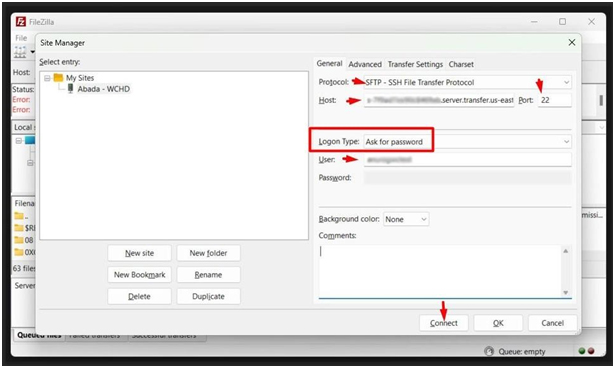
Set up a Server Connection:
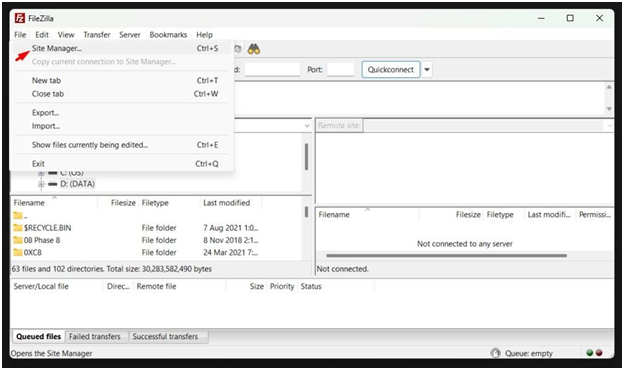
1.) Start FileZilla. Select the FileZilla icon on your desktop or in your Windows Start
2.) From the File menu, select Site Manager.
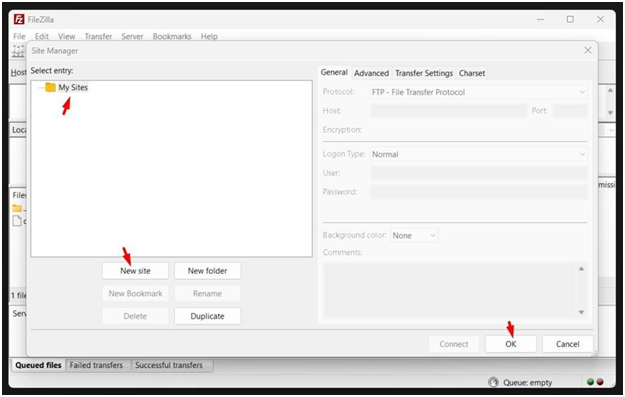
3.) Select New Site.
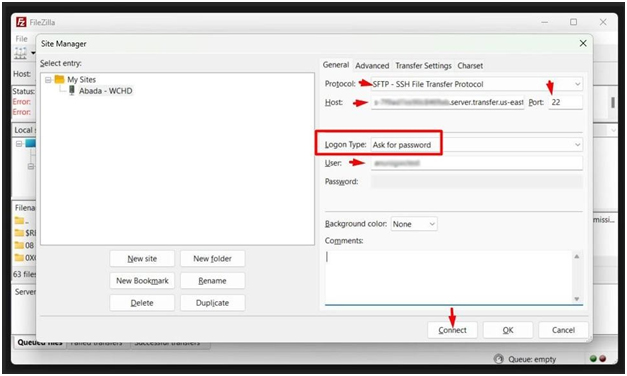
4.) Do the following:
- In the Protocol box, select SFTP – SSH File Transfer Protocol.
- In the Host box, enter the address of the server you’re connecting
- In the Port box, enter 22.
- In the Logon Type box, select Ask for Password.
- In the User box, enter the username you were assigned for this
- To connect immediately, select Connect and skip to step 4
- Or to connect later, select OK.
Transfer Files:
1.) Start FileZilla. Select the FileZilla icon on your PC.
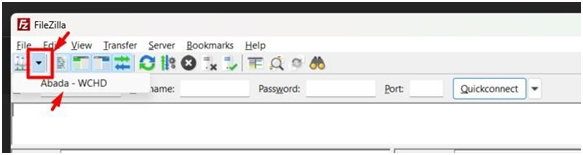
2.) Select the arrow next to the Open Site Manager button, and then select the server you set up in the previous procedure.

3.) Site Manager Opens. In the Port box, enter 22. Select Connect.
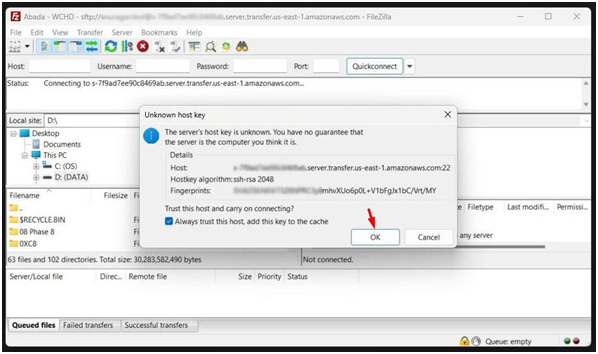
4.) The first time you connect to a new server, FileZilla displays a warning. If you are sure this is the right site, select Always trust this host and select OK.
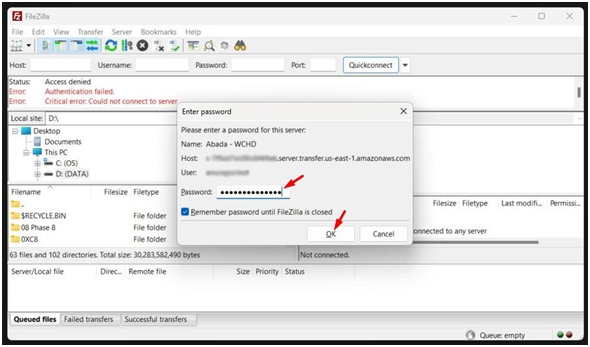
5.) In the Password box, enter your password for this server, then select OK.
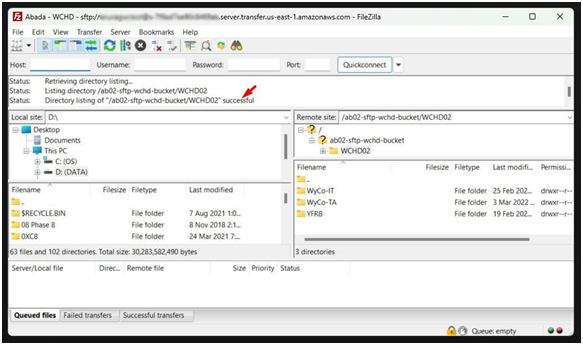
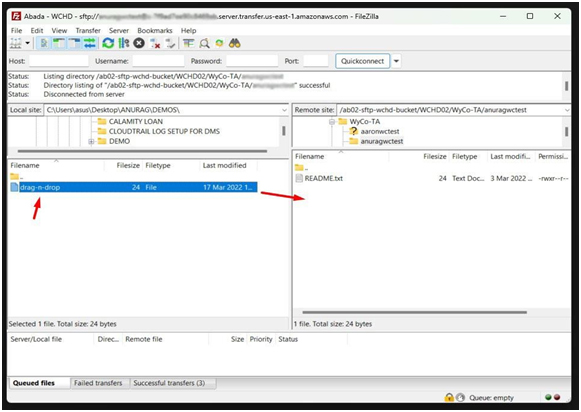
6.) FileZilla opens. Your computer (Local Site) is on the left and the server (Remote Site) is on the right. Navigate to different locations on either system. Drag and drop files or folders to copy files.
Hide
Set up a Server Connection:
1.) Start FileZilla. Select the FileZilla icon on your desktop or in your Windows Start menu.
2.) From the File menu, select Site Manager.
3.) Select New Site.
4.) Do the following:
- In the Protocol box, select SFTP – SSH File Transfer Protocol.
- In the Host box, enter the address of the server you’re connecting
- In the Port box, enter 22.
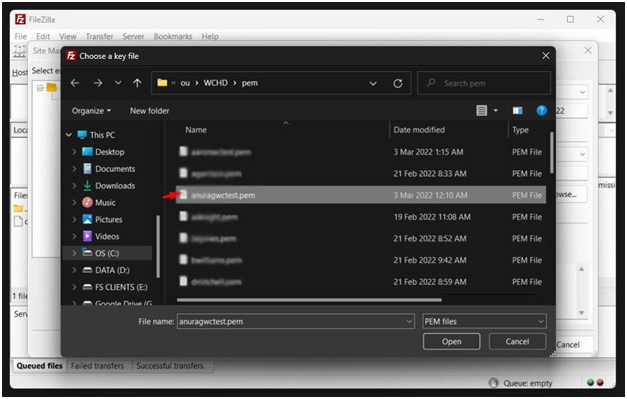
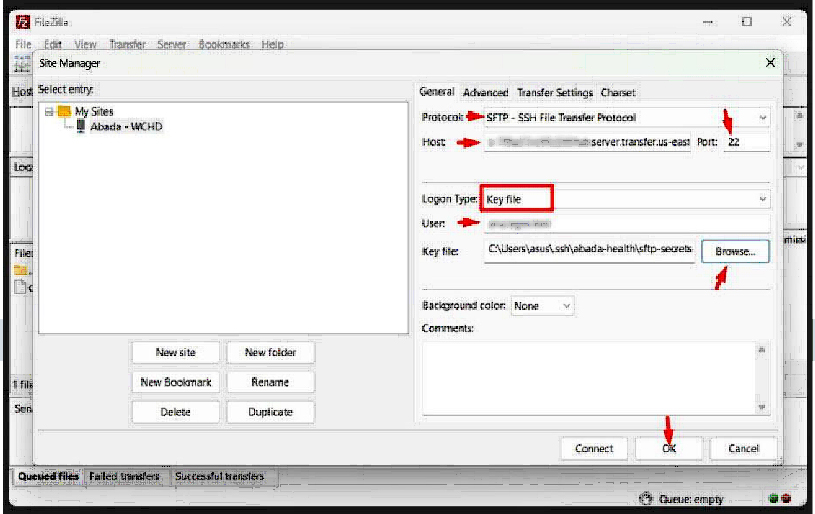
- In the Logon Type box, select Key file. Click the Browse, and locate the PEM file then hit the Open button.
- In the User box, enter the username you were assigned for this
- Locate the save location of the key file given to
- To connect immediately, select Connect and skip to step 4
- Or to connect later, select OK.
Transfer Files:
1.) Start FileZilla. Select the FileZilla icon on your desktop or in your Windows Start menu.
2.) Select the arrow next to the Open Site Manager button, and then select the server you set up in the previous procedure.
3.) The first time you connect to a new server, FileZilla displays a warning. If you are sure this is the right site, select Always trust this host and select OK.

4.) You will then successfully connected to the server.

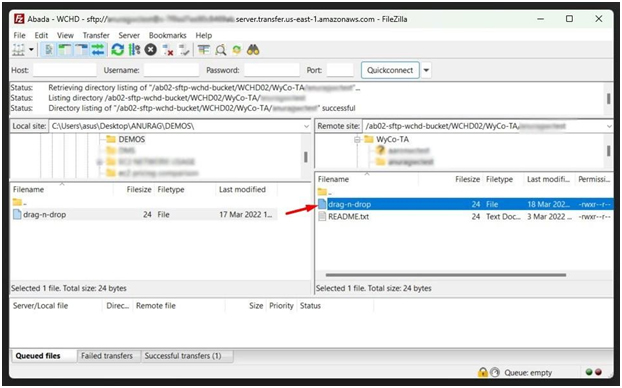
5.) FileZilla opens. Your computer (Local Site) is on the left and the server (Remote Site) is on the right. Navigate to different locations on either system. Drag and drop files or folders to copy files.
Step 2: (Option 2) - Key-based authentication
Set up a Server Connection:
1.) Start FileZilla. Select the FileZilla icon on your desktop or in your Windows Start menu.
2.) From the File menu, select Site Manager.
3.) Select New Site.
4.) Do the following:
- In the Protocol box, select SFTP – SSH File Transfer Protocol.
- In the Host box, enter the address of the server you’re connecting
- In the Port box, enter 22.
- In the Logon Type box, select Key file. Click the Browse, and locate the PEM file then hit the Open button.
- In the User box, enter the username you were assigned for this
- Locate the save location of the key file you saved and click ”Open“
- To connect immediately, select Connect and skip to step 4
- Or to connect later, select OK.
Transfer Files:
1.) Start FileZilla. Select the FileZilla icon on your desktop or in your Windows Start menu.
2.) Select the arrow next to the Open Site Manager button, and then select the server you set up in the previous procedure.
3.) The first time you connect to a new server, FileZilla displays a warning. If you are sure this is the right site, select Always trust this host and select OK.
4.) You will then be successfully connected to the server.
5.) FileZilla opens. Your computer (Local Site) is on the left and the server (Remote Site) is on the right. Navigate to different locations on either system. Drag and drop files or folders to copy files.
Hide
Step 2: (Option 2) - Password-based authentication
Set up a Server Connection:
1.) Start FileZilla. Select the FileZilla icon on your desktop or in your Windows Start menu.
2.) From the File menu, select Site Manager.
3.) Select New Site.
4.) Do the following:
- In the Protocol box, select SFTP – SSH File Transfer Protocol.
- In the Host box, enter the address of the server you’re connecting
- In the Port box, enter 22.
- In the Logon Type box, select Key file. Click the Browse, and locate the PEM file then hit the Open button.
- In the User box, enter the username you were assigned for this
- Locate the save location of the key file given to
- To connect immediately, select Connect and skip to step 4
- Or to connect later, select OK.
Transfer Files:
1.) Start FileZilla. Select the FileZilla icon on your desktop or in your Windows Start menu.
2.) Select the arrow next to the Open Site Manager button, and then select the server you set up in the previous procedure.
3.) The first time you connect to a new server, FileZilla displays a warning. If you are sure this is the right site, select Always trust this host and select OK.
4.) You will then successfully connected to the server.
5.) FileZilla opens. Your computer (Local Site) is on the left and the server (Remote Site) is on the right. Navigate to different locations on either system. Drag and drop files or folders to copy files.
